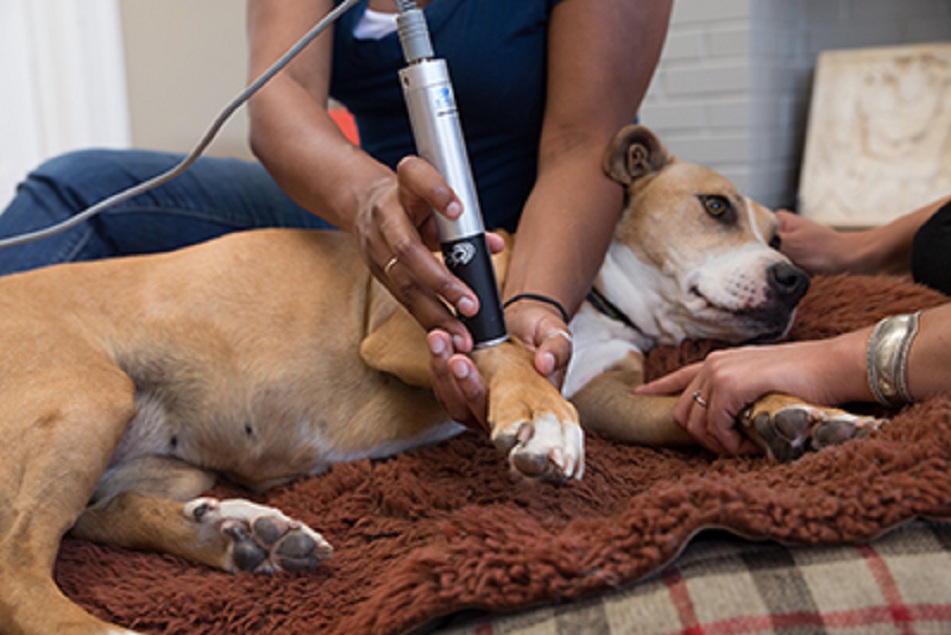
Laser therapy, also called low-level laser therapy (LLLT) or cold laser therapy, uses visible light radiation to produce a photochemical reaction in the body’s cells. LLLT does not emit heat.
How to use cold laser therapy at home
- Start by aligning the laser device over your dog’s painful/affected area.
- Keep the device at least 0.5 inches away if your dog suffers from skin lesions (burns, open wounds).
- Keep the laser at a right angle and do not press it on the affected area.
- Do not move the wand left or right, forward or backward. Keep it still until the set time expires.
- For larger breeds or dogs with extensive wounds, it may take 20-30 minutes per session.
- For each spot, start with 1.5 minutes per affected area and then change to 4 minutes the second time you use the laser device.
- Use the cold laser therapy device for dogs at least twice a day, for better results.
The whole procedure usually takes several minutes. You may need to use the device several times a day for weeks or more, depending on your dog’s condition.
Ear infections
Step 1 – Place the laser device along the side of the ear canal vertically and hold it for 4 minutes.
Step 2 – Place the device below de ear canal horizontally and hold it for 4 minutes.
Reading Suggestion: How Much Does It Cost to Dog Taxidermy?
Hip arthritis and dysplasia
Step 1 – Place the laser device behind the hip joint vertically and hold it for 4 minutes.
Step 2 – Place the device in front of the hip joint vertically, and hold it for 4 minutes.
Step 3 – Place the device above the hip joint horizontally and hold it for 4 minutes.
Elbow osteoarthritis
Step 1 – Place the device along the outer side of the forearm vertically and hold for 4 minutes.
Step 2 – Place the device along the inner fold of the forearm vertically, and hold for 4 minutes.
Step 3 – Place the device on the inner side of the forearm at the crease vertically and hold for 4 minutes.
Tendon weakness
Hold the device for 4-6 minutes for each painful area.
Anterior cruciate ligament (ACL) and cranial cruciate ligament (CCL) rupture and knee pain
Step 1 – Place the device along the inner side of the knee and hold it for 4 minutes.
Step 2 – Place the device along the outer side of the knee and hold for 4 minutes.
Step 3 – Place the device on the back of the knee along the crease and hold for 4 minutes.
Back Pain, intervertebral disc disease, and spinal problems
Place the device along each side of the spine, on the lumbar muscles. Hold it for 4 minutes on each spot. For large breeds, also place the device on additional spots in the back and hold it for 4 minutes.
Neck pain
Place the device on the painful cervical vertebrae(s) and hold it for 4 minutes for each spot.
Reading Suggestion: Platinum Dog Food Reviews and Recommendations
Gingivitis, periodontitis, and stomatitis
Step 1 – Place de device along the outside of the mouth near the upper premolars and hold it for 4 minutes.
Step 2 – Place the device on the jaw bone near the lower premolars and hold it for 4 minutes, if there is a problem in the lower gums.
For dogs suffering from stomatitis, place the device where the teeth end to reach the back of your pet’s throat.
Wounds and burns
First, you have to undress your pet’s wound and clean it, according to your vet’s recommendations.
Keep the device at 0.5 inches away from the wound or burnt area.
Place the device over the affected area and hold it for 4 minutes.
If the wounded area is wider than 4.5 cm, place and hold the device again for 4 minutes on the adjacent areas. Repeat until the entire surface is covered.
Pododermatitis
Place the device along the upper side and lower pad side of the toes, and between the webbing. Hold it for 4 minutes per each affected area.


